Layout width customization
Template width is defined by grid, and divided into number of columns (default is 12 columns).
To change width of template, open file: variables.less in: templates/t3_bs3_blank/less then change defined width of template.
// Media queries breakpoints
// --------------------------------------------------

// Extra small screen / phone
// Note: Deprecated @screen-xs and @screen-phone as of v3.0.1
@screen-xs:                  480px;
@screen-xs-min:              @screen-xs;
@screen-phone:               @screen-xs-min;

// Small screen / tablet
// Note: Deprecated @screen-sm and @screen-tablet as of v3.0.1
@screen-sm:                  768px;
@screen-sm-min:              @screen-sm;
@screen-tablet:              @screen-sm-min;

// Medium screen / desktop
// Note: Deprecated @screen-md and @screen-desktop as of v3.0.1
@screen-md:                  992px;
@screen-md-min:              @screen-md;
@screen-desktop:             @screen-md-min;

// Large screen / wide desktop
// Note: Deprecated @screen-lg and @screen-lg-desktop as of v3.0.1
@screen-lg:                  1200px;
@screen-lg-min:              @screen-lg;
@screen-lg-desktop:          @screen-lg-min;
Now change the size for the responsive layouts.
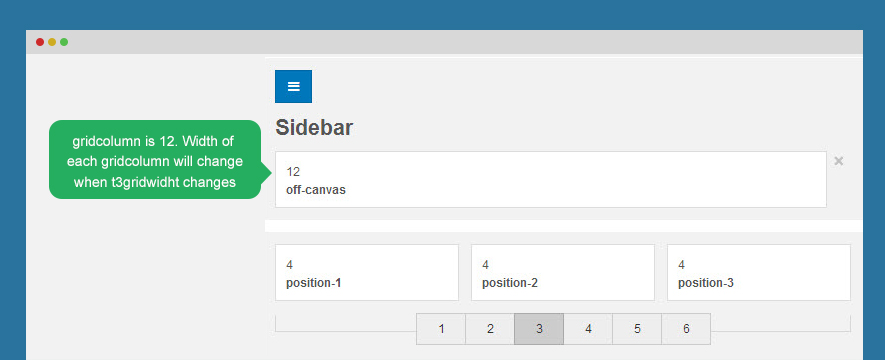
And here is the grid system. You can change the number of grids.
// Grid system
// --------------------------------------------------

// Number of columns in the grid system
@grid-columns:              12;
// Padding, to be divided by two and applied to the left and right of all columns
@grid-gutter-width:         30px;
// Point at which the navbar stops collapsing
@grid-float-breakpoint:     @screen-sm-min;
Theme customization
All theme folders are located in: templates/t3_bs3_blank/less/themes/
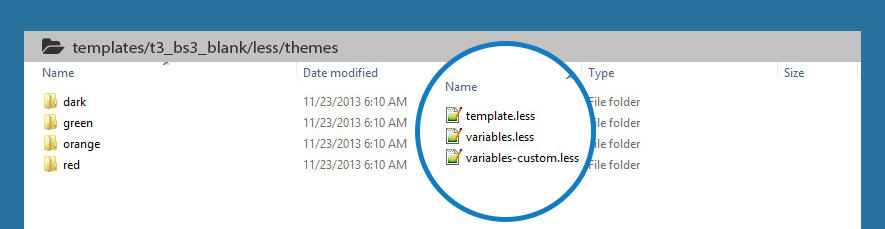
In each theme folder, it has 3 files:
1. template.less this file includes style that is customized from default theme.
// Logo Text
// ----------
.logo-text h1 {
color: @white;
}

// Taglines
.logo-text .site-slogan {
display: block;
font-size: @font-size-base;
margin-top: 5px;
}
2. variables.less: this file includes customized variables from default variables.less file.
// Global values
// --------------------------------------------------
@t3-base-img-path:              "../../../images";
@t3-theme-img-path:             "@{t3-base-img-path}/themes/dark";

// Scaffolding
// -------------------------
@body-bg:                       @gray-darker;
@text-color:                    @gray-lighter;
3. variables-custom.less: this file includes new variables that you create to customize current theme.
// Links
// -------------------------
@link-color:                    lighten(@blue, 20%);
Create new theme
The best way to create new theme is cloning theme folder.
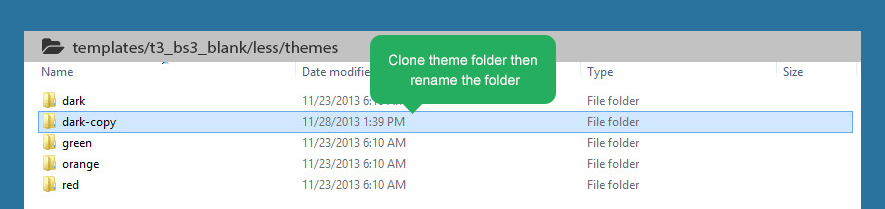
You can do manual by creating new theme folder then add 3 files: template.less, variables.less and variables-custom.less
Customize Theme
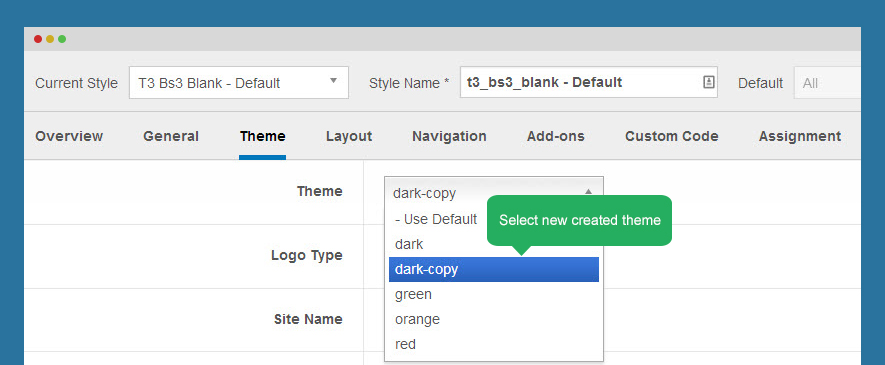
In the back-end, you can select the new created theme for style you want then customize theme with ThemeMagic.
You can customize theme with LESS files of created theme in: templates/t3_bs3_blank/less/themes/dark-copy
Compile LESS to CSS
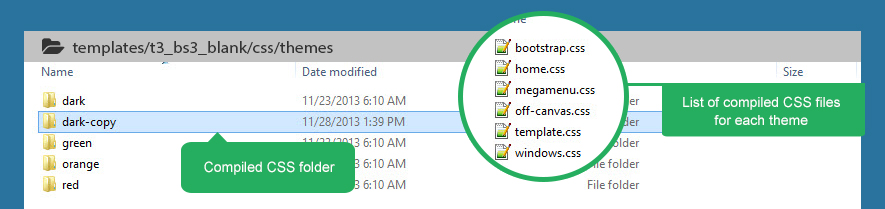
After customizing theme, please compile LESS to CSS. The new theme CSS files will be located in templates/t3_bs3_blank/css/themes/dark-copy
Please do not customize your theme with the CSS files, as they will overriden each time you run Compile LESS to CSS.
Added CSS files are:
bootstrap.csshome.cssmegamenu.cssoff-canvas.csswindows.css
All added css files will be loaded when site runs on the theme, by this way, all files are loaded from 1 folder only then it will improve site performance.
Customize template with CSS
T3 Framework is developed with LESS, the LESS files are compiled to CSS files. Each time you compile, CSS files will be overridden so we suggest you not to use CSS to customize, develop your site because when you compile, your work can be lost.
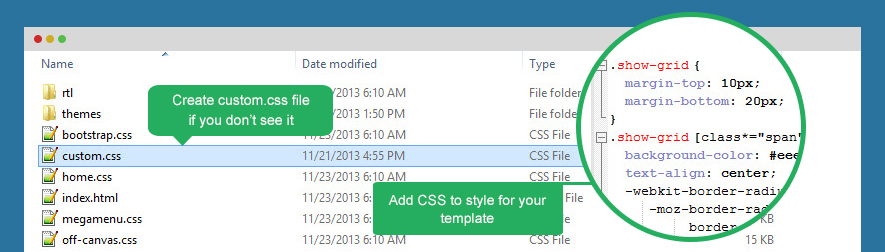
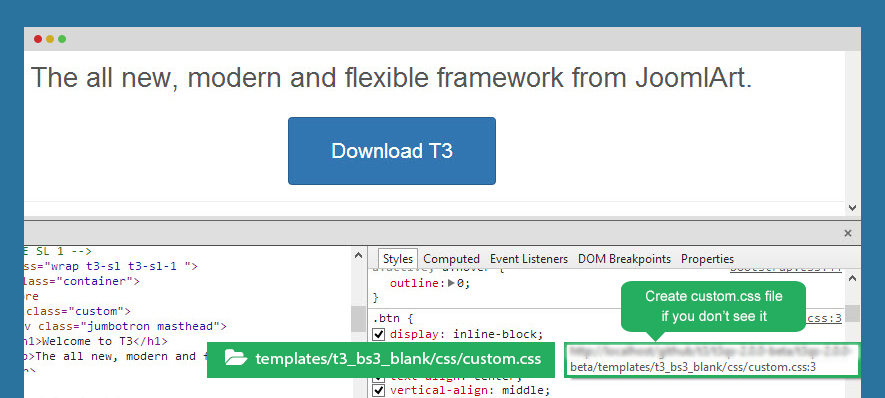
The custom.css file is located in: templates/t3_blank/css . If you don't see the file, create new file then open that file to add CSS to style for your template.
custom.css file
- The file is not included by default, you need to create new one.
- The file is the last file to be loaded in your site.
- The file is not a compiled file from LESS so it will not be overridden or lost when you compile.
Working with the file
The Custom.css file is the same as any other CSS file. Enter the CSS to style for your template.
.show-grid {
margin-top: 10px;
margin-bottom: 20px;
}
.show-grid [class*="span"] {
background-color: #eee;
text-align: center;
-webkit-border-radius: 3px;
-moz-border-radius: 3px;
border-radius: 3px;
min-height: 40px;
line-height: 40px;
}
.show-grid:hover [class*="span"] {
background: #ddd;
}
Let's check front-end
ThemeMagic customization
T3 Framework is powerful by its easy theme customization based on ThemeMagic. You are allowed to add unlimited parameters for customization.
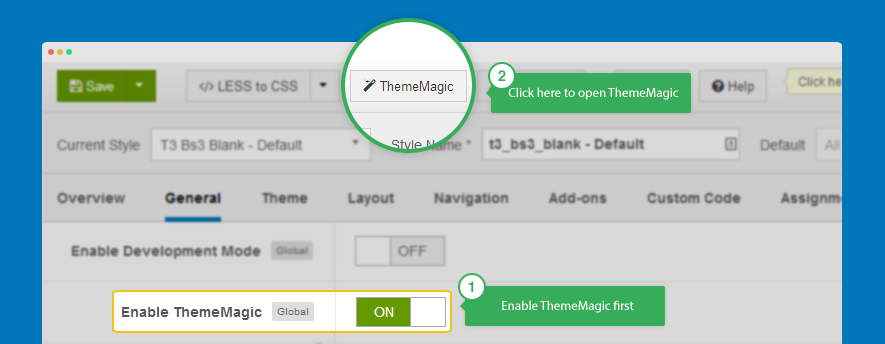
You have to enable ThemeMagic first, then click on the ThemeMagic button to open ThemeMagic pannel.
Thememagic working pannel
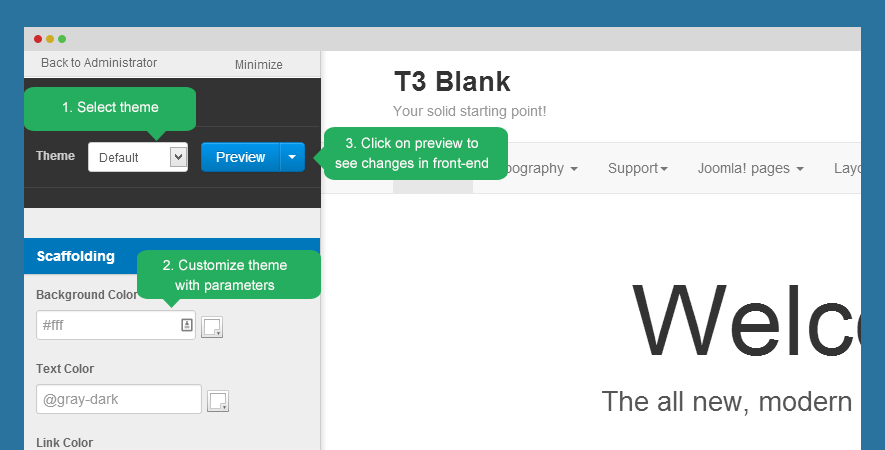
- Select theme to customize
- Customize theme by changing parameter values
- Click on preview to see the changes
- Save or save as copy the customized theme
Add new parameters to ThemeMagic
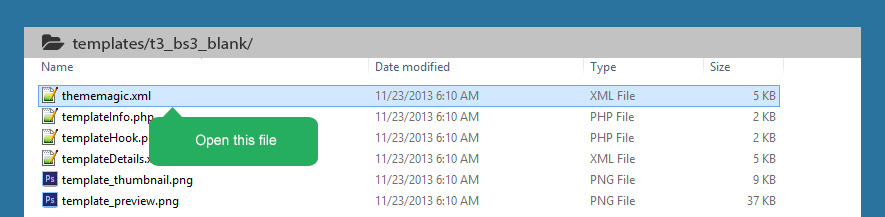
You can add unlimited parameters, groups for theme customization. The customized parameters is set in the thememagic.xml file in the folder: templates/t3_bs3_blank
Step 1. Define a new group
<fieldset name="custom1_params" label="CUSTOM1_LABEL">
</fieldset>
<fieldset name="module_params" label="T3_TM_MODULE">
</fieldset>
Step 2. Define parameter in new group
<field name="@your-field-name"
type="type-of-parameter"
default="default-value-of-parameter"
label="FIEL_LABEL"
description="FIELD_DESCRIPTION" />
</field>
<fieldset name="module_params" label="T3_TM_MODULE">
<field name="t3-module-bg" type="color" class="t3tm-color" label="T3_TM_VARS_MODULE_BGCOLOR_LABEL" description="T3_TM_VARS_MODULE_BGCOLOR_DESC" />
</fieldset>
Step 3. Define LESS parameter
Define LESS parameter with the same name as defined above @your-field-name in file variables.less in template/less/.
// Module General
@t3-module-bg:                  transparent;
Step 4. Add "@your-field-name" somewhere in LESS file
It depends on you, just think how you want to use this parameter and how it affects to the template. It is required that you have some base knowledge about LESS and CSS. We suggest you to add to the file: style.less
.t3-module {
background: @t3-module-bg;
}
Step 5. Define language key
Open the language file of the template en-GB.tpl_t3_bs3_blank.ini located in language\en-GB\ and define language key that you use to define parameters above.
; MODULE
T3_TM_MODULE					="Module"
T3_TM_VARS_MODULE_BGCOLOR_LABEL			="Module Background Color"
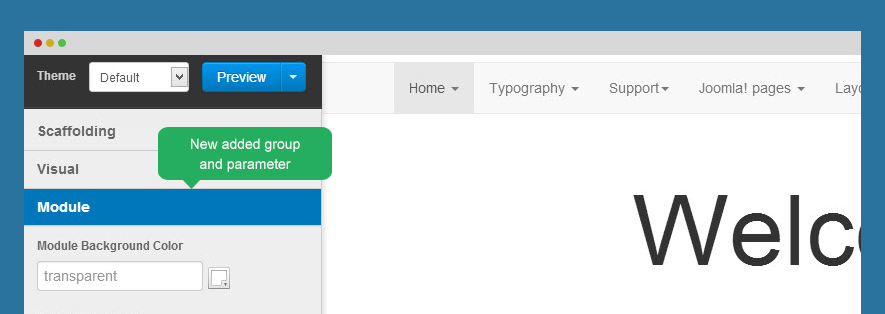
Check in ThemeMagic to check whether new group and parameters are added or not
Logo customization
1. Change the Logo image
There are 2 ways to change the logo for a Joomla template developed with T3 Framework.
#1: Change logo from the Template Manager
Each style can go with different logo. To set style for the logo, please open Theme settings in Template style setting.
#2: Change the Logo from the variable.less file
Another way to change thelogo is changing the logo image path in variables.less file, which is located in the templates/t3_blank/less fodler.
// T3 LOGO
// --------------------------------------------------
@T3logoWidth:     60px;
@T3logoHeight:    50px;

@T3LogoImage:     "../images/logo.png";
You can also change the logo block size, by changing the value of the @T3logoWidth: and @T3logoHeight: variables.
2. Logo styling
To customize style for the logo, open the file style.less that is located in the templates/t3_blank/less folder. Search for the logo text, you'll find the style where you can either add more styles or customize it as is.
// Logo
// ---------------------------------------------------------
.logo {
float: left;

a {
display: inline-block;
line-height: 1;
margin: 0;
}

}

// Logo Image
// ----------
.logo-image {
overflow: hidden;

a {
background-image: url("@{T3LogoImage}");
background-repeat: no-repeat;
width: @T3logoWidth;
height: @T3logoHeight;
}

//hide sitename and slogan
span, small {
display: none;
}

}
Footer info customization
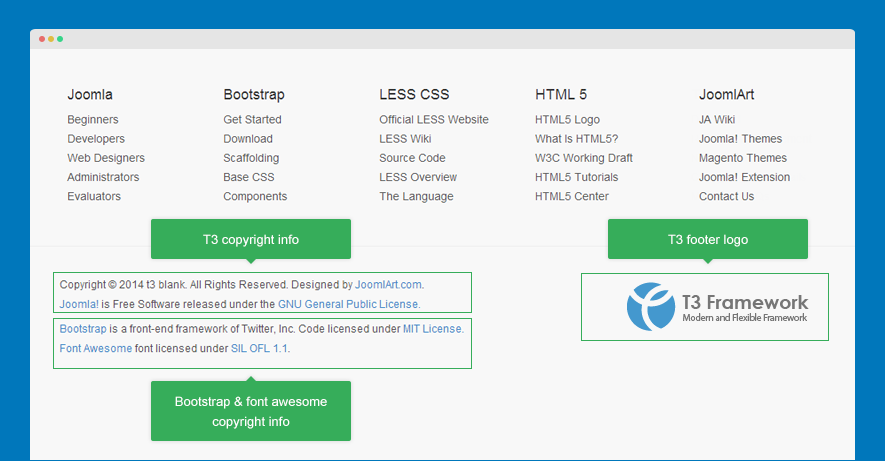
The default footer info of T3 blank includes 3 things:
- T3 Footer logo
- T3 copyright info
- Bootstrap copyright info
1. Customize T3 Footer logo
#1: how to disable the footer logo?
To disable the footer logo, open T3 template manager, in the Global tab, disable T3 Logo option.
#2: change link, class ... for t3 footer
Open the footer.php file located in templates/t3_bs3_blank/tpls/blocks/, change link of the footer logo, add/change class to style the logo ...
<?php if ($this->getParam('t3-rmvlogo', 1)): ?>
<div class="col-md-4 poweredby text-hide">
<a class="t3-logo t3-logo-color" href="http://t3-framework.org" title="<?php echo JText::_('T3_POWER_BY_TEXT') ?>"
target="_blank" <?php echo method_exists('T3', 'isHome') && T3::isHome() ? '' : 'rel="nofollow"' ?>><?php echo JText::_('T3_POWER_BY_HTML') ?></a>
</div>
<?php endif; ?>
#3: change footer logo image, size and customize style
The style of footer logo is in the t3.less file located in plugins/system/t3/base-bs3/less. Open the file and customize style of the logo.
// T3 Logo
// ---------------------------------------------------------
.t3-logo,
.t3-logo-small {
display: block;
text-decoration: none;
//text-indent: -9999em; - use text-hide
text-align: left;
background-repeat: no-repeat;
background-position: center;
}

// Sizes
.t3-logo {
width: 182px;
height: 50px;
}

.t3-logo-small {
width: 60px;
height: 30px;
}

// Styles
.t3-logo,
.t3-logo-color {
background-image: url("http://static.joomlart.com/images/jat3v3-documents/logo-complete/t3logo-big-color.png");
}

.t3-logo-small,
.t3-logo-small.t3-logo-color {
background-image: url("http://static.joomlart.com/images/jat3v3-documents/logo-complete/t3logo-small-color.png");
}

.t3-logo-dark {
background-image: url("http://static.joomlart.com/images/jat3v3-documents/logo-complete/t3logo-big-dark.png");
}

.t3-logo-small.t3-logo-dark {
background-image: url("http://static.joomlart.com/images/jat3v3-documents/logo-complete/t3logo-small-dark.png");
}

.t3-logo-light {
background-image: url("http://static.joomlart.com/images/jat3v3-documents/logo-complete/t3logo-big-light.png");
}

.t3-logo-small.t3-logo-light {
background-image: url("http://static.joomlart.com/images/jat3v3-documents/logo-complete/t3logo-small-light.png");
}
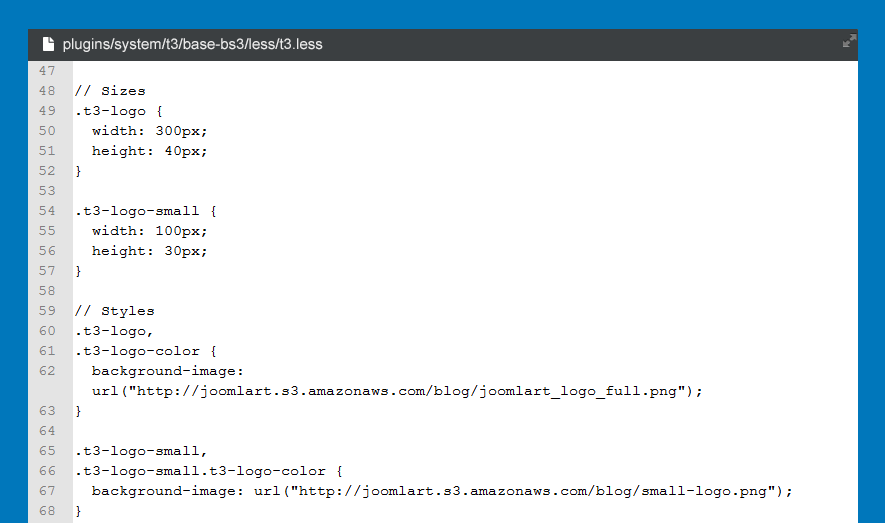
You can change the logo image, size of logo image ...
Exmaple:
// Sizes
.t3-logo {
width: 300px;
height: 40px;
}

.t3-logo-small {
width: 100px;
height: 30px;
}

// Styles
.t3-logo,
.t3-logo-color {
background-image: url("http://static.joomlart.com/blog/joomlart_logo_full.png");
}

.t3-logo-small,
.t3-logo-small.t3-logo-color {
background-image: url("http://static.joomlart.com/blog/small-logo.png");
}
Front-end appearance
2. Customize T3 copyright info
The T3 copyright info is in the default.php file located in templates/t3_bs3_blank/html/mod_footer. Open that file and customize T3 copyright info.
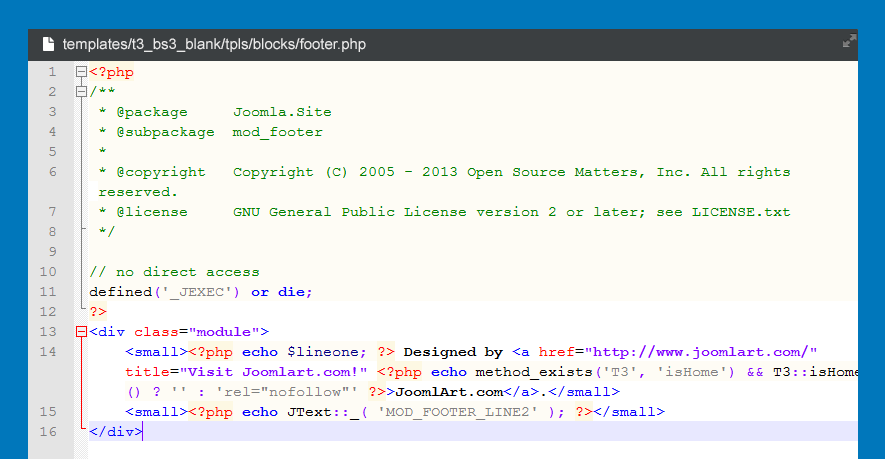
<?php
/**
* @package     Joomla.Site
* @subpackage  mod_footer
*
* @copyright   Copyright (C) 2005 - 2013 Open Source Matters, Inc. All rights reserved.
* @license     GNU General Public License version 2 or later; see LICENSE.txt
*/

// no direct access
defined('_JEXEC') or die;
?>
<div class="module">
<small><?php echo $lineone; ?> Designed by <a href="http://www.joomlart.com/" title="Visit Joomlart.com!" <?php echo method_exists('T3', 'isHome') && T3::isHome() ? '' : 'rel="nofollow"' ?>>JoomlArt.com</a>.</small>
<small><?php echo JText::_( 'MOD_FOOTER_LINE2' ); ?></small>
</div>
3. Customize Bootstrap and font awesome copyright info
Open the footer.php file located in templates/t3_bs3_blank/tpls/blocks/ then customize the copyright info of Bootstrap and font awesome.
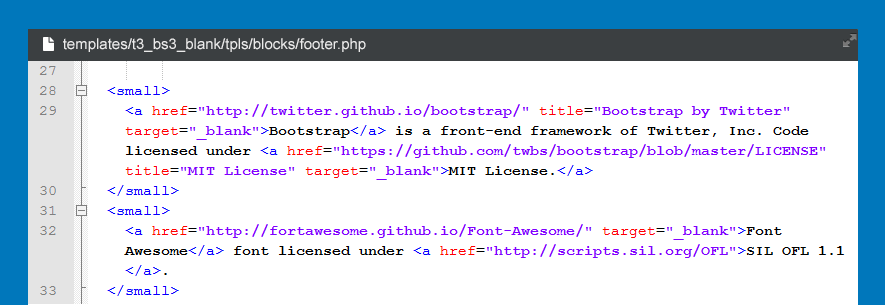
<small>
<a href="http://twitter.github.io/bootstrap/" title="Bootstrap by Twitter" target="_blank">Bootstrap</a> is a front-end framework of Twitter, Inc. Code licensed under <a href="https://github.com/twbs/bootstrap/blob/master/LICENSE" title="MIT License" target="_blank">MIT License.</a>
</small>
<small>
<a href="http://fortawesome.github.io/Font-Awesome/" target="_blank">Font Awesome</a> font licensed under <a href="http://scripts.sil.org/OFL">SIL OFL 1.1</a>.
</small>
Add/install new fonts
Step 1: add the font package(s)
Upload your font package(s) to templates/t3_bs3_blank/fonts.
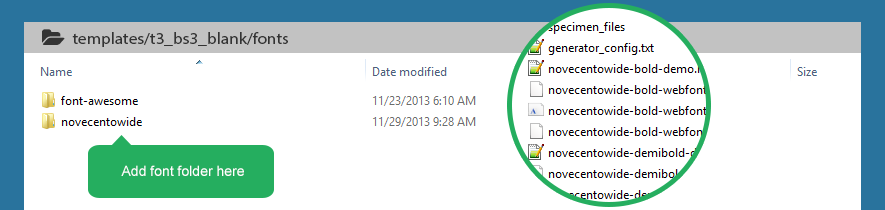
Step 2: define fonts
Now open file assets.xml located in the templates/template_folder/etc folder to define the font(s) you just added
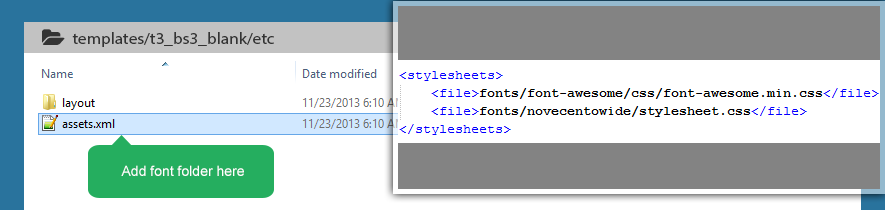
<stylesheets>
<file>fonts/font-awesome/css/font-awesome.min.css</file>
<file>fonts/novecentowide/stylesheet.css</file>
</stylesheets>
Google Fonts
T3 Framework supports Google fonts, all you have to do is define the google font you would like to use in the assets.xml file (located in the templates/template_folder/etc folder).
<stylesheets>
<file>http://fonts.googleapis.com/css?family=Roboto+Slab:400,100,300</file>
</stylesheets>
Embed stylesheet and Javascripts
To add new style sheets and Javascripts to T3 Framework, there are 2 ways to do that. You can either declare the new style sheets and Javascripts to head.php file or assets.xml file.
#1. Use head.php file
Open file head.php in the templates/t3_bs3_blank/tpls/blocks folder, then declare the new style sheets and Javascripts as you wish with the format as below.
Add CSS style sheets
<?php
// CUSTOM CSS
if(is_file(T3_TEMPLATE_PATH . '/css/custom.css')) {
$this->addStyleSheet(T3_TEMPLATE_URL.'/css/custom.css');
}
?>
Add Javascripts
<?php
if(is_file(T3_TEMPLATE_PATH . '/templates/TEMPLATE-FOLDER-NAME/js/slider/lofslidernews.mt11.js')) {
$this->addScript(T3_TEMPLATE_URL.'/templates/TEMPLATE-FOLDER-NAME/js/slider/lofslidernews.mt11.js');
}
?>
Just copy then correct the path to the CSS and Javascripts files.
Joomla provides addStyleSheet, addScript, addScriptDeclaration functions, which are the ones you should be using.
#2. Use assets.xml file
Another method to add new the CSS, Javascripts is embedding them to assets.xml, which is located in the templates/t3_bs3_blank/etc folder.
CSS style sheets and Fonts
Add the path to the style sheets and fonts you want to embed to your site. Use below format:
<stylesheets>
<file>fonts/novecentowide/stylesheet.css</file>
<file>http://fonts.googleapis.com/css?family=Roboto+Slab:400,100,300</file>
</stylesheets>
Javascripts
Add the path to the Javascripts files you want to embed to your site. Use the below format:
<scripts>
<file>js/jquery.mousewheel.js</file>
<file>js/iscroll.js</file>
<file>js/script.js</file>
</scripts>
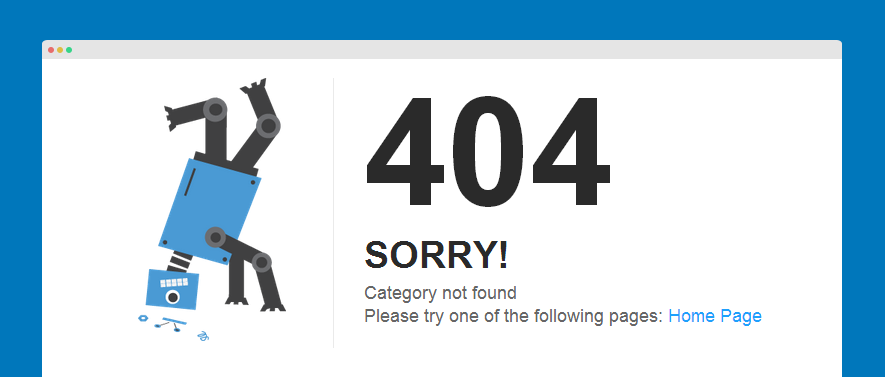
Override 404 page and offline page
1. Override 404 Page
Normally, each JA Template goes with its own 404 page style. If you would like to customize it, this will guide you through the quick how-to:
Step 1: add file error.php
The best way to add this file is to copy the default joomla error.php file in templates/system then copy to templates/t3_bs3_blank/

Step 2: Customize 404 page
Open this file and customize it as you want the page to be.
You can define which CSS file that the page will use.
<link rel="stylesheet" href="/<?php echo $this->baseurl ?>/templates/<?php echo $this->template ?>/css/error.css" type="text/css" />
You can create new css file for 404 page but we suggest to copy the default joomla error.css file in templates/system/css then paste to templates/t3_bs3_blank/css/ folder. Open the file and start your customization.
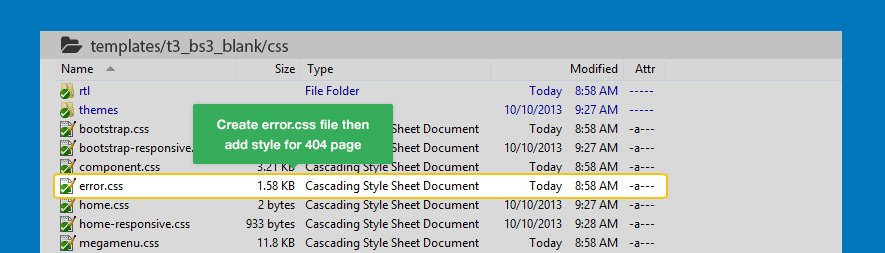
One more thing is that each theme can use different CSS file so that it will have different style.
<?php if($theme && is_file(T3_TEMPLATE_PATH . '/css/themes/' . $theme . '/error.css')):?>
<link rel="stylesheet" href="/<?php echo $this->baseurl ?>/templates/<?php echo $this->template ?>/css/themes/<?php echo $theme ?>/error.css" type="text/css" />
<?php endif; ?>
<?php
/**
* @package		Joomla.Site
* @copyright	Copyright (C) 2005 - 2012 Open Source Matters, Inc. All rights reserved.
* @license		GNU General Public License version 2 or later; see LICENSE.txt
*/

defined('_JEXEC') or die;
if (!isset($this->error)) {
$this->error = JError::raiseWarning(404, JText::_('JERROR_ALERTNOAUTHOR'));
$this->debug = false;
}
//get language and direction
$doc = JFactory::getDocument();
$this->language = $doc->language;
$this->direction = $doc->direction;
$theme = JFactory::getApplication()->getTemplate(true)->params->get('theme', '');
?>
<!DOCTYPE html PUBLIC "-//W3C//DTD XHTML 1.0 Transitional//EN" "http://www.w3.org/TR/xhtml1/DTD/xhtml1-transitional.dtd">
<html xmlns="http://www.w3.org/1999/xhtml" xml:lang="<?php echo $this->language; ?>" lang="<?php echo $this->language; ?>" dir="<?php echo $this->direction; ?>">
<head>
<title><?php echo $this->error->getCode(); ?> - <?php echo $this->title; ?></title>
<link rel="stylesheet" href="/<?php echo $this->baseurl ?>/templates/<?php echo $this->template ?>/css/error.css" type="text/css" />
<?php if($theme && is_file(T3_TEMPLATE_PATH . '/css/themes/' . $theme . '/error.css')):?>
<link rel="stylesheet" href="/<?php echo $this->baseurl ?>/templates/<?php echo $this->template ?>/css/themes/<?php echo $theme ?>/error.css" type="text/css" />
<?php endif; ?>
<link href='http://fonts.googleapis.com/css?family=Handlee' rel='stylesheet' type='text/css'>
</head>

<body class="page-error">
<div class="error-page-wrap">
<div class="inner">

<div class="error-code"><?php echo $this->error->getCode(); ?></div>

<div class="error-message">
<h2>SORRY!</h2>
<p>
<?php echo $this->error->getMessage(); ?><br />
<?php echo JText::_('JERROR_LAYOUT_PLEASE_TRY_ONE_OF_THE_FOLLOWING_PAGES'); ?> <a href="/<?php echo $this->baseurl; ?>/index.php" title="<?php echo JText::_('JERROR_LAYOUT_GO_TO_THE_HOME_PAGE'); ?>"><?php echo JText::_('JERROR_LAYOUT_HOME_PAGE'); ?></a>
</p>
</div>

</div>
</div>

</body>
</html>
The css files of 404 page in each theme is located in templates/t3_bs3_blank/css/themes/theme_name/
Note:
The CSS files are NOT overridden when you compile LESS to CSS.
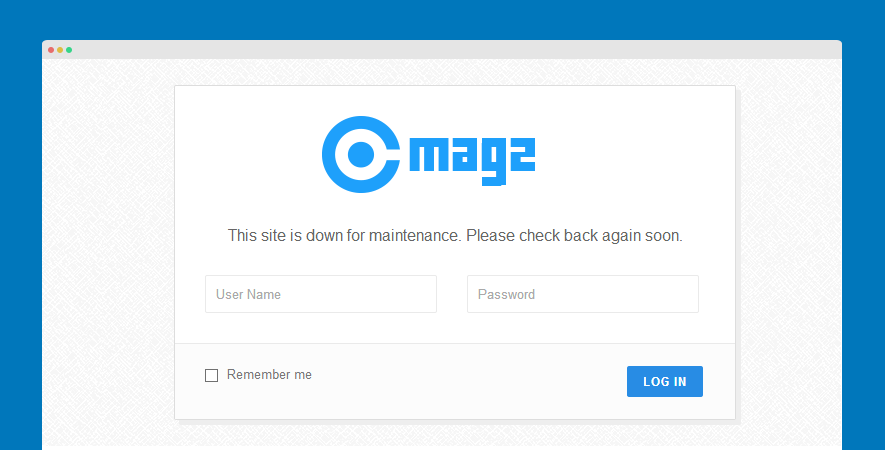
2. Override offline page
To customize the Offline Page, you only need to go through the same procedure as you do for the 404 page customization
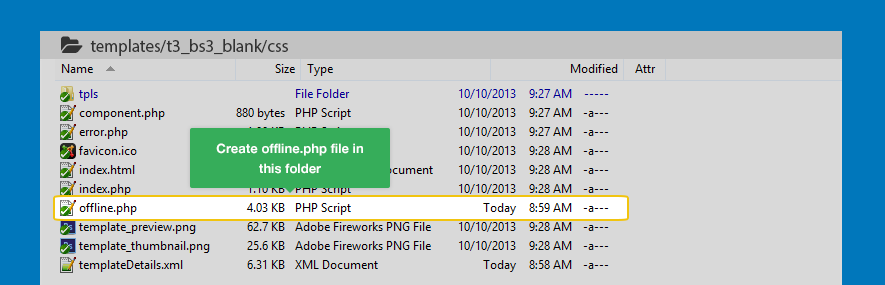
Step 1: add new offline.php file.
Copy the file offline.php in folder templates/system then paste to templates/t3_bs3_blank
Step 2: Customize Offline page
Open this file and customize it as you want the Offline page to be.
You can define which CSS file that the page will use.
<link rel="stylesheet" href="/<?php echo $this->baseurl ?>/templates/<?php echo $this->template ?>/css/offline.css" type="text/css" />
You can create new css file for Offline page but we suggest to copy the default joomla offline.css file in templates/system/css then paste to templates/t3_bs3_blank/css/ folder.
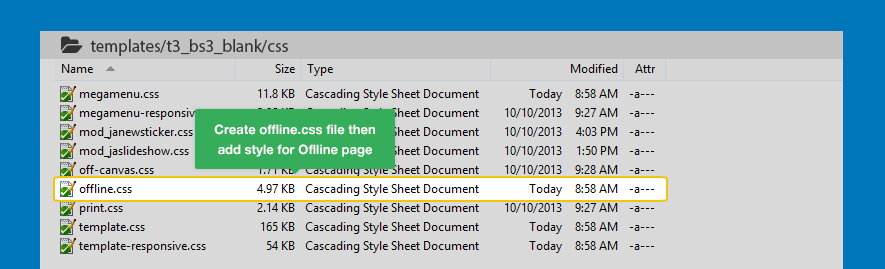
You can define each theme to use a css file so that each theme will have different style for Offline page.
<?php if($theme && is_file(T3_TEMPLATE_PATH . '/css/themes/' . $theme . '/offline.css')):?>
<link rel="stylesheet" href="/<?php echo $this->baseurl ?>/templates/<?php echo $this->template ?>/css/themes/<?php echo $theme ?>/offline.css" type="text/css" />
<?php endif; ?>
<?php
/**
* $JA#COPYRIGHT$
*/

defined('_JEXEC') or die;
$app = JFactory::getApplication();
$theme = JFactory::getApplication()->getTemplate(true)->params->get('theme', '');
//check if t3 plugin is existed
if(!defined('T3')){
if (JError::$legacy) {
JError::setErrorHandling(E_ERROR, 'die');
JError::raiseError(500, JText::_('T3_MISSING_T3_PLUGIN'));
exit;
} else {
throw new Exception(JText::_('T3_MISSING_T3_PLUGIN'), 500);
}
}

$t3app = T3::getApp($this);
?>


<!DOCTYPE html PUBLIC "-//W3C//DTD XHTML 1.0 Transitional//EN" "http://www.w3.org/TR/xhtml1/DTD/xhtml1-transitional.dtd">
<html xmlns="http://www.w3.org/1999/xhtml" xml:lang="<?php echo $this->language; ?>" lang="<?php echo $this->language; ?>" dir="<?php echo $this->direction; ?>">
<head>
<jdoc:include type="head" />
<link rel="stylesheet" href="/<?php echo $this->baseurl ?>/templates/<?php echo $this->template ?>/css/offline.css" type="text/css" />
<?php if($theme && is_file(T3_TEMPLATE_PATH . '/css/themes/' . $theme . '/offline.css')):?>
<link rel="stylesheet" href="/<?php echo $this->baseurl ?>/templates/<?php echo $this->template ?>/css/themes/<?php echo $theme ?>/offline.css" type="text/css" />
<?php endif; ?>
<?php
// T3 BASE HEAD
$t3app->addHead();?>
</head>
<body>

<div id="frame" class="outline">
<div class="offline-page">
<?php if ($app->getCfg('offline_image') && file_exists($app->getCfg('offline_image'))) : ?>

<img src="/<?php echo $app->getCfg('offline_image'); ?>" alt="<?php echo htmlspecialchars($app->getCfg('sitename')); ?>" />
<?php endif; ?>

<div class="brand">
<a href="/\index.php" title="<?php echo htmlspecialchars($app->getCfg('sitename')); ?>"><?php echo htmlspecialchars($app->getCfg('sitename')); ?></a>
</div>

<div class="offline-message">
<?php if ($app->getCfg('display_offline_message', 1) == 1 && str_replace(' ', '', $app->getCfg('offline_message')) != ''): ?>
<p>
<?php echo $app->getCfg('offline_message'); ?>
</p>
<?php elseif ($app->getCfg('display_offline_message', 1) == 2 && str_replace(' ', '', JText::_('JOFFLINE_MESSAGE')) != ''): ?>
<p>
<?php echo JText::_('JOFFLINE_MESSAGE'); ?>
</p>
<?php  endif; ?>
</div>

<div class="login-form">
<form action="<?php echo JRoute::_('index.php', true); ?>" method="post" id="form-login">

<fieldset class="input">
<div class="wrap-input">
<p id="form-login-username">
<input name="username" id="username" type="text" class="inputbox" alt="<?php echo JText::_('JGLOBAL_USERNAME') ?>" size="18" placeholder="<?php echo JText::_('JGLOBAL_USERNAME') ?>" />
</p>

<p id="form-login-password">
<input type="password" name="password" class="inputbox" size="18" alt="<?php echo JText::_('JGLOBAL_PASSWORD') ?>" id="passwd" placeholder="<?php echo JText::_('JGLOBAL_PASSWORD') ?>" />
</p>
<?php if (count($twofactormethods) > 1) : ?>
<p id="form-login-secretkey">
<label for="secretkey"><?php echo JText::_('JGLOBAL_SECRETKEY') ?></label>
<input type="text" name="secretkey" class="inputbox" size="18" alt="<?php echo JText::_('JGLOBAL_SECRETKEY') ?>" id="secretkey" />
</p>
<?php endif; ?>
</div>

<?php if (JPluginHelper::isEnabled('system', 'remember')) : ?>
<p id="form-login-remember">

<input type="checkbox" name="remember" class="inputbox" value="yes" alt="<?php echo JText::_('JGLOBAL_REMEMBER_ME') ?>" id="remember" />
<label for="remember"><?php echo JText::_('JGLOBAL_REMEMBER_ME') ?></label>
<input type="submit" name="Submit" class="button" value="<?php echo JText::_('JLOGIN') ?>" />
</p>
<?php endif; ?>


<input type="hidden" name="option" value="com_users" />
<input type="hidden" name="task" value="user.login" />
<input type="hidden" name="return" value="<?php echo base64_encode(JURI::base()) ?>" />
<?php echo JHtml::_('form.token'); ?>
</fieldset>
</form>

<jdoc:include type="message" />
</div>

</div>
</div>
</body>
</html>
The css files of Offline page in each theme is located in templates/t3_bs3_blank/css/themes/theme_name/
Note:
The CSS files are NOT overridden when you compile LESS to CSS.
Add the "back to top" button
The "Back to top" button allows you to quickly navigate to the top of your site.
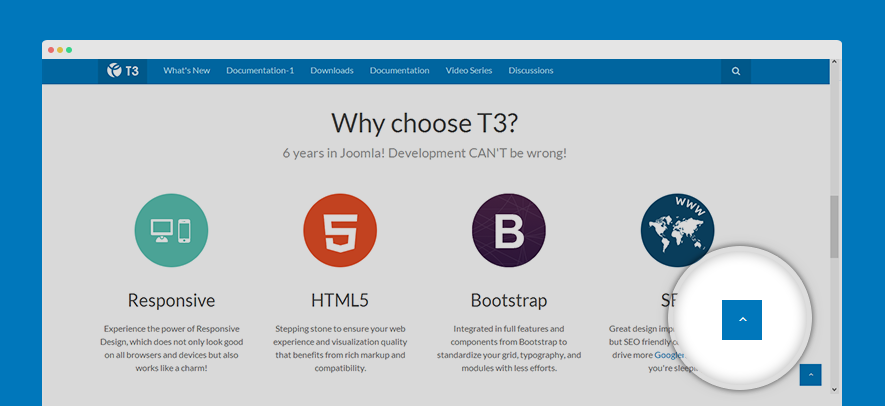
Step 1: enable "back to Top" button
To add this button in your site, open the file templates/t3_bs3_blank/tpls/blocks/footer.php then add the following code to the file.
<!-- BACK TOP TOP BUTTON -->

<div id="back-to-top" data-spy="affix" data-offset-top="300" class="back-to-top hidden-xs hidden-sm affix-top">

  <button class="btn btn-primary" title="Back to Top"><i class="fa fa-angle-up"></i></button>

</div>


<script type="text/javascript">

(function($) {

	// Back to top

	$('#back-to-top').on('click', function(){

		$("html, body").animate({scrollTop: 0}, 500);

		return false;

	});

})(jQuery);

</script>

<!-- BACK TO TOP BUTTON -->
Step 2: style "back to top" button
Open the file templates/t3_bs3_blank/less/style.less then add the style rule:
// Back to Top
// -----------
#back-to-top {
  position: fixed;
  right: @t3-global-margin;
  top: auto;
  z-index: 999;
  display: none;
  bottom: -60px;

  @media (min-width: @screen-sm-min) {
    display: block;
  }

  .btn {
    background: none;
    border: 2px solid @brand-primary;
    color: @brand-primary;
    height: 40px;
    width: 40px;
    border-radius: 50%;
    line-height: 1;
    padding: 0;
    text-align: center;
    .opacity(0.7);
    .transition(0.2s);

    &:hover, &:active, &:focus {
      background: none;
      outline: none;
      .opacity(1);
    }
  }

  &.affix {
    bottom: @t3-global-margin * 2;
  }

  a {
    outline: none;
  }

  i {
    font-size: @font-size-large + 10;
    line-height: 22px;
  }
}
Multilingual for megamenu
T3 Framework supports Megamenu, when you run a multilingual site, you have to configure multi-language for Megamenu. Follow this guide to make it work.
Please make sure all the steps in setting up a multilingual site are done completely. If these steps weren't not done yet, there are 2 ways to build up a multilingual site: manual setup or auto setup with JA Multilingual Component. It's up to you to go either way.
Manual Setup Guide JA Multilingual Guide
Create menus for languages
Step 1: Create menus for languages
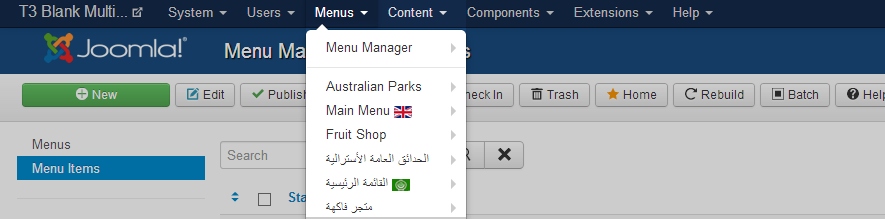
For each language, you will need to create a menu system based on the default language menu system. For example, your site is curently in 2 languages: English and Arabic. Then you should create menus for Arabic language based on the existing menus of theEnglish language.
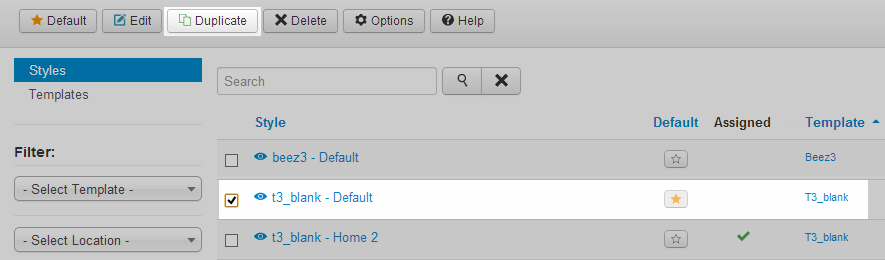
Step 2: Duplicate the default template style
Go to Extensions >> Template Manager then duplicate the default template style.
Step 3: Rename and assign language for the duplicated template style
Next, open the duplicated template style to rename it. Then assign to the desired language.

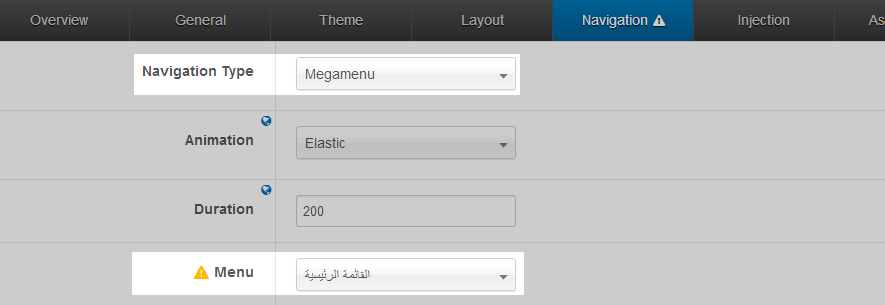
Step 4: Assign menu for Megamenu
Now open the Navigation tab, enable Megamenu then assign the created menu in the Menu field.
Step 5: Save Mengamenu settings
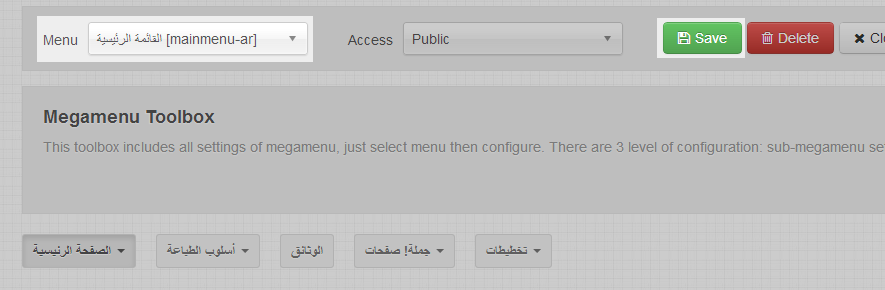
Now all you have to do is SAVE the Megamenu settings, please keep in mind that this step is required even if you haven't change anything as it aims to detect your Megamenu.
Open the Megamenu setting panel and then make sure you select the right menu - Mainmenu for Arabic language.
Multi instance megamenu
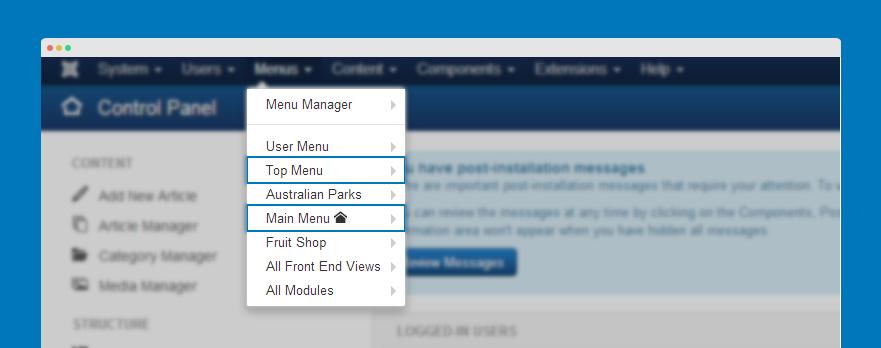
T3 Framework allows you to create multiple instances for Megamenu. In this writing, we will create Megamenu for Main Menu and Top Menu on a site.
Step 1: create mainmenu and topmenu
Step 2: create menu items for mainmenu and topmenu

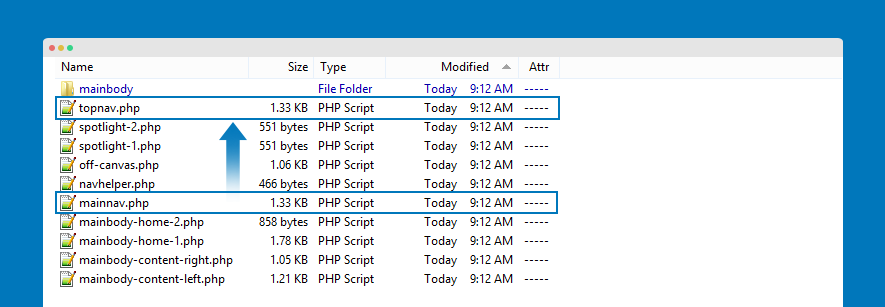
Step 3: create topnav.php file
Duplicate file mainnav.php in templates/t3_bs3_blank/tpls/blocks then rename to topnav.php.
Step 4: customize mainnav.php file
Open mainnav.php file then change:
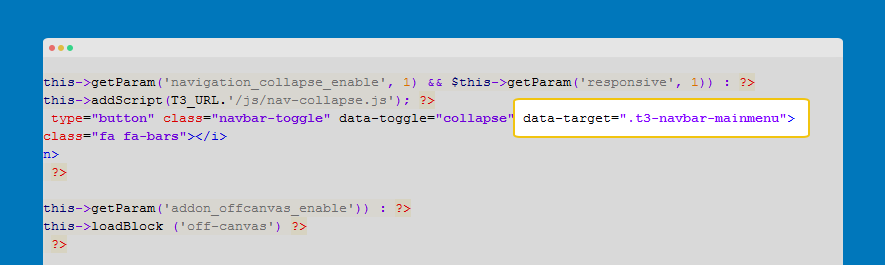
Find the code
data-target=".t3-navbar-collapse"
Replace with:
data-target=".t3-navbar-mainmenu"
"mainmenu" is the menu type name of Main Menu.
Add class t3-navbar-mainmenu
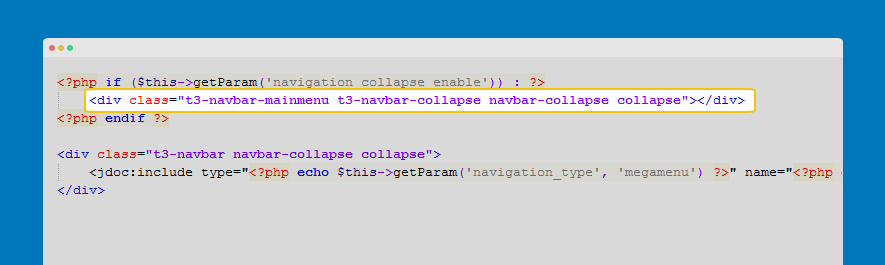
Find the code
<div class="t3-navbar-collapse navbar-collapse collapse"></div>
Replace with:
<div class="t3-navbar-mainmenu t3-navbar-collapse navbar-collapse collapse"></div>
Step 5: customize topnav.php file
Open topnav.php file then replace the following code.
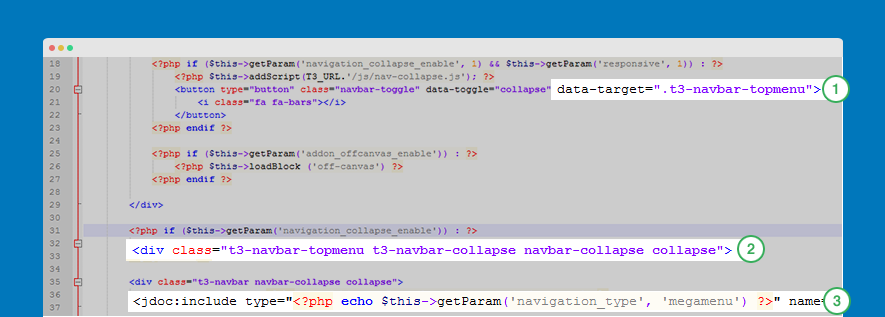
Find the code
data-target=".t3-navbar-collapse"
Replace with:
data-target=".t3-navbar-topmenu"
Add class t3-navbar-topmenu
Find the code
<div class="t3-navbar-collapse navbar-collapse collapse"></div>
Replace with:
<div class="t3-navbar-topmenu t3-navbar-collapse navbar-collapse collapse"></div>
Find the code
<jdoc:include type="<?php echo $this->getParam('navigation_type', 'megamenu') ?>" name="<?php echo $this->getParam('mm_type', 'mainmenu') ?>" />
Replace with:
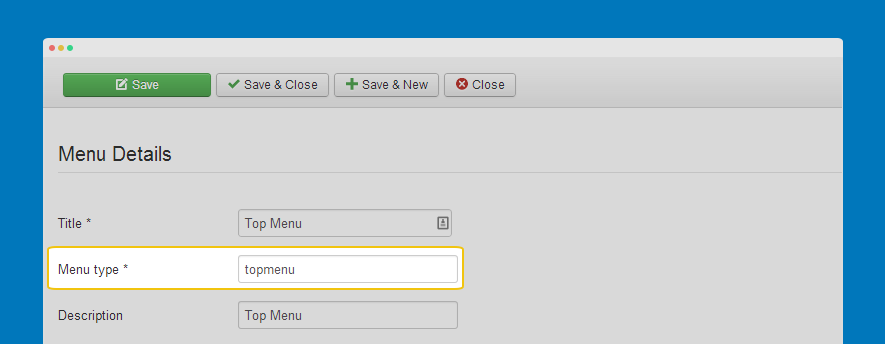
<jdoc:include type="<?php echo $this->getParam('navigation_type', 'megamenu') ?>" name="'topmenu" menutype="topmenu" />
Please note that the topmenu is from menu type name.
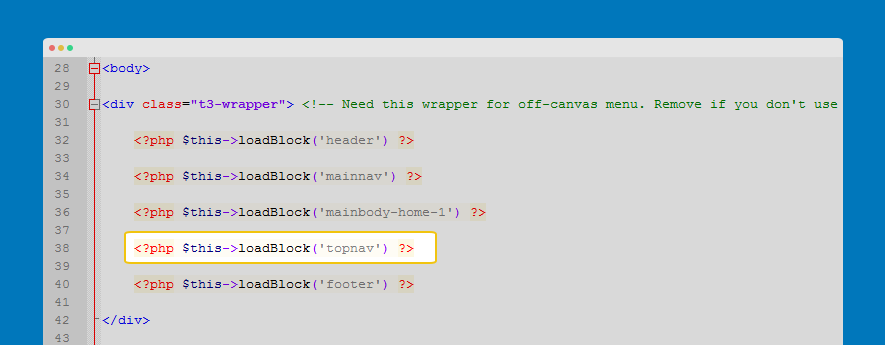
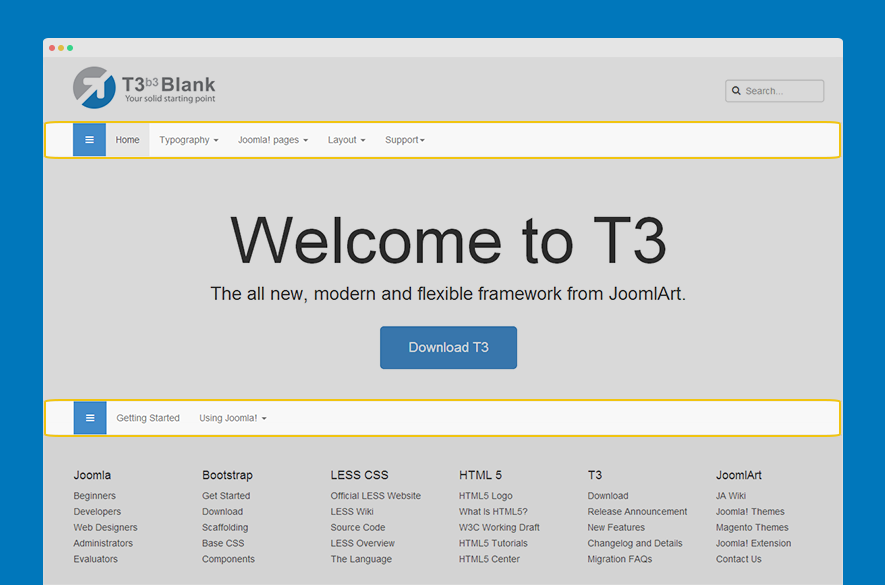
Step 6: call loadBlock for topmenu
Open file home-1.php or default.php in templates/t3_bs3_blank/tpls.
<?php $this->loadBlock ('topnav') ?>