Framework Setting
T3 Framework comes with powerfull admin panel
I. Global Setting
The global settings are applied for all styles, themes and layout, no matter the settings are changed in any styles.
Development Mode
This is an important option. You should clearly define the differences between enabling and disabling the option.
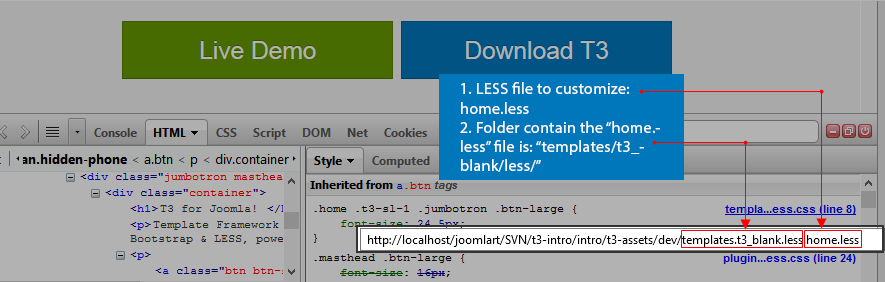
Enable Development Mode

When you are developing your site, you should enable this option. Once it's turned on, your site directly runs on original files - LESS files. You can use firebug to track.
After you finish your development, you should compile LESS to CSS. This option will compile LESS files to CSS files. All your changes in LESS files will be compiled to corresponding CSS files.

In this mode, it is easy for you to develop your site with LESS but it will decrease your site speed so when you finish developing, turn the option off.
Disable Development Mode
When you are not developing your site, you should disable the option. This will increase your site speed. In this mode, your site runs on CSS, not LESS. The CSS files are compiled from LESS files.
Incase Development mode is off, you are allowed to enable or disable option: Optimize CSS

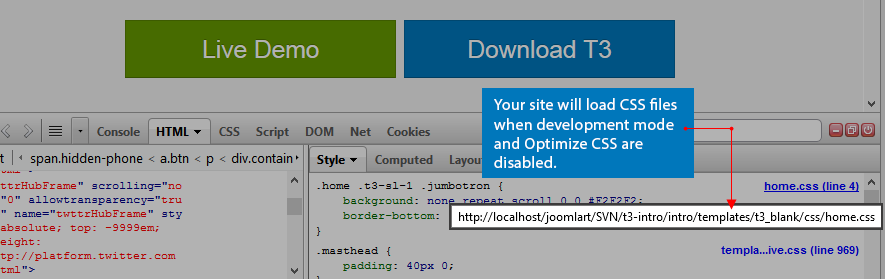
Disable "Optimize CSS"
When Optimize CSS is disabled, your site normally loads CSS files (the CSS files are compiled from LESS files).
Enable "Optimize CSS"
When Optimize CSS is enabled, T3 will join and compress most possible CSS files into one or several files for site performance .
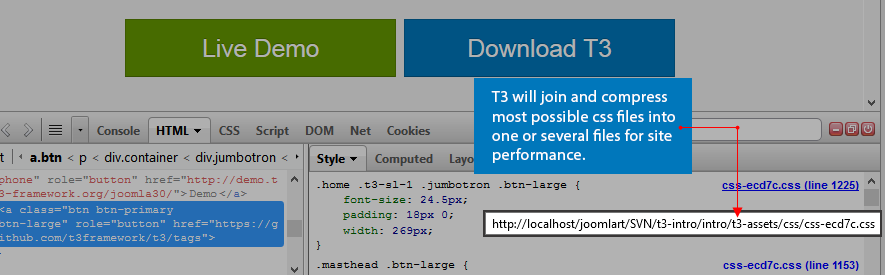
The optimized css files are located in the folder defined in T3 Assets Folder option.

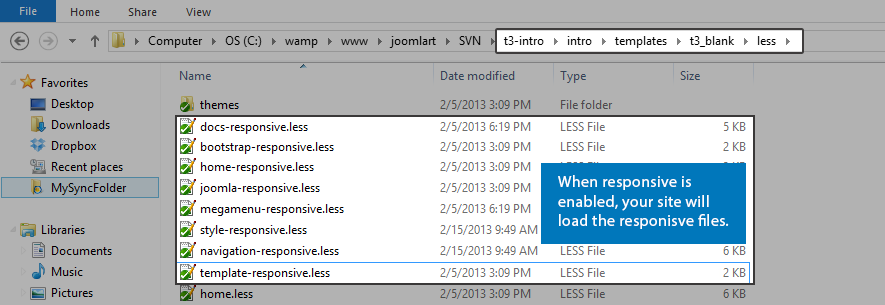
Enable Responsive
T3 allows you to turn on or off the feature RESPONSIVE with one click.

When the option is disabled, your site is a non-responsive site. When responsive is disabled, all responsive files are not loaded (actually, they are not called, your site ignores the files).
Enable ThemeMagic
Step 1: Enable the option "Enable ThemeMagic"
Step 2: Access The ThemeMagic setting panel

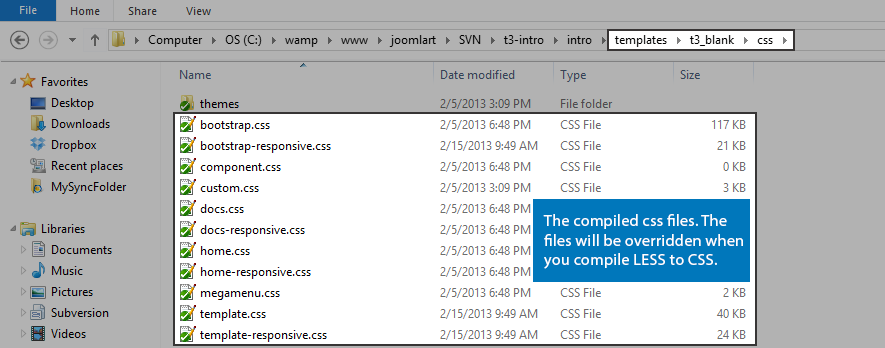
II. Compile LESS to CSS

When to use the option?
The Compile LESS to CSS option is to compile the LESS that that we use to develop the webiste to CSS files that our website runs on (when development mode is off). The LESS files will be compiled to corresponding CSS files. And it will override all current CSS files.
III. Theme Settings
The Theme settings allows you to configure the Theme, Logo. The settings can be also configured in the ThemeMagic setting panel
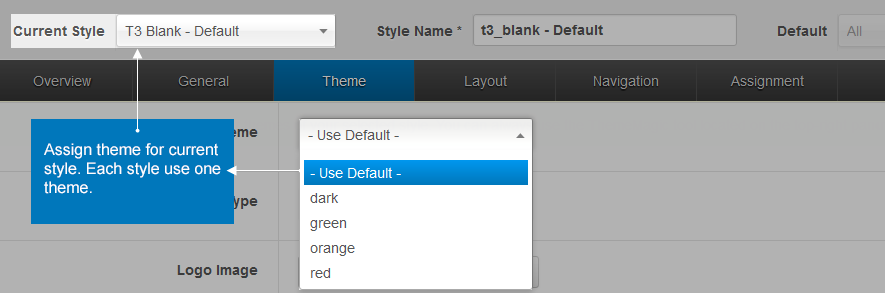
Theme Setting
Select a theme that you want the current style applies. Each style goes with one theme.
Logo Setting
T3 allows you to select image or text logo. If you select to use image logo, browse to the image that is displayed as logo. If you select text logo, enter the text that is displayed as logo, slogan is optional.
Now, let's see how front-end looks like.
Change Logo Image and Customize Logo size
An other way to change logo is change the logo image path in the file: variables.less in: templates/ja_t3v3_blank/less. You can also customize the logo size in this file.
 // T3 LOGO
// --------------------------------------------------
@T3logoWidth:     270px;
@T3logoHeight:    65px;

@T3LogoImage:     "../images/logo.png";
IV. Layout Setting
Layout configuration
T3 comes with ease of layout customization. The visual layout configuration allows you to configure layout never easier.
Still have trouble?Layout customization
The video tutorial guides you how to customize the layouts, how to add new layout, and how to customize blocks in a layout
Still have trouble?Select Layout for style
In T3 framework, each style will use one layout (but please keep in mind that one site use many styles --> so one site can use multiple layouts simultaneously because T3 use multiple styles simultaneously).

Layout Configuration
In the layout setting, there are 2 parts to be configured: Layout structure and Responsive layout configuration.
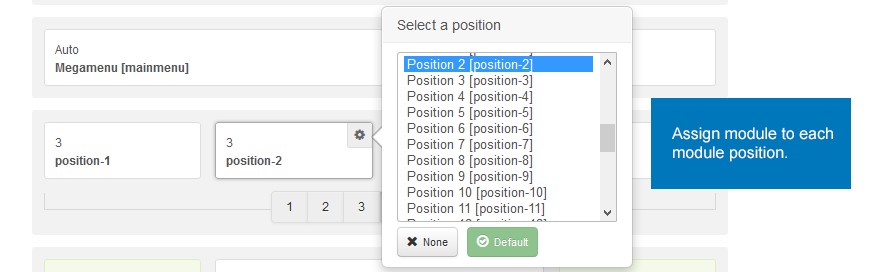
Layout Structure Configuration
Assign module to module position.
Set number of columns in each spotlight block.

Responsive Layout Configuration
Select responsive layout.

Enable/disable content in a responsive layout.

V. Navigation Setting
Megamenu configuration
This is the video tutorial for Megamenu configuration, you will learn how to build up a Megamenu, how to use Megamenu settings effectively, how to add icons, how to style menu item with our T3 Framework
Still have trouble?Adding Animation Effect for Megamenu
In this tutorial, you will learn how to add animation effect for Megamenu. There are 4 animation types, for each animation type selected, you can set the duration for that effect when you hovering or change menus
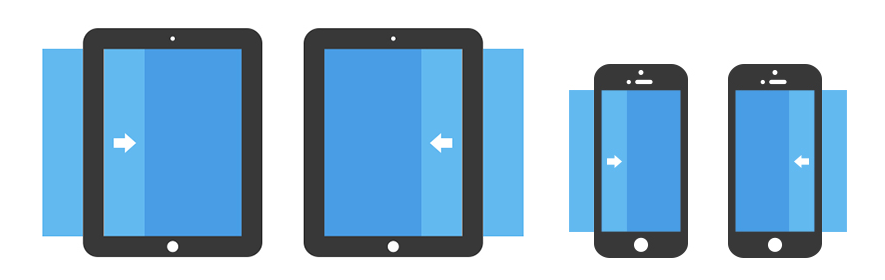
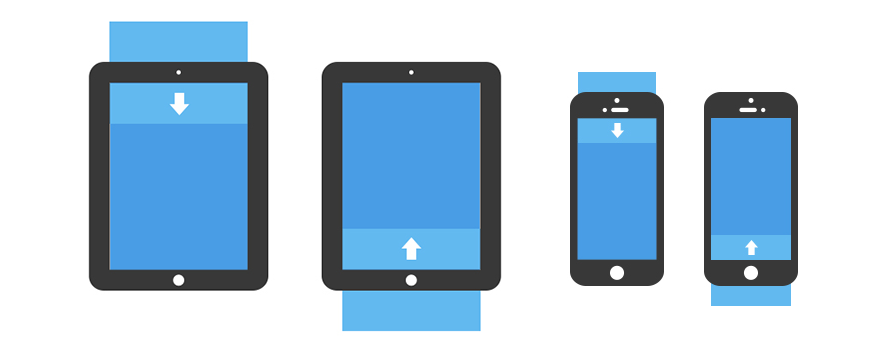
Still have trouble?Off-Canvas Navigation
On portable devices the screen is intentionally small and the only way to fit a Web page’s content is to stack it up -unless you decide to use the space outside a browser’s visible canvas. Off canvas layouts do just that. These layouts take advantage of space off the screen to keep content or navigation hidden until either a larger screen size allows it to be visible or someone takes action to expose it.
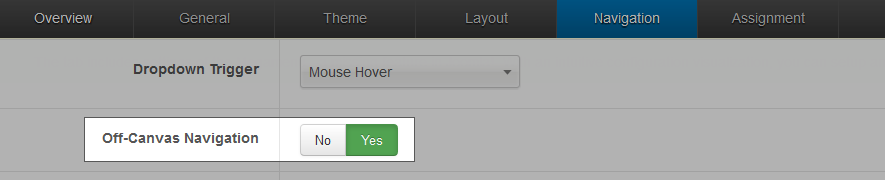
Enable Off-Canvas Navigation
To enable this option, from back-end of your site, navigate to: Extensions >> Template Manager >> JA Template >> open Navigation tab
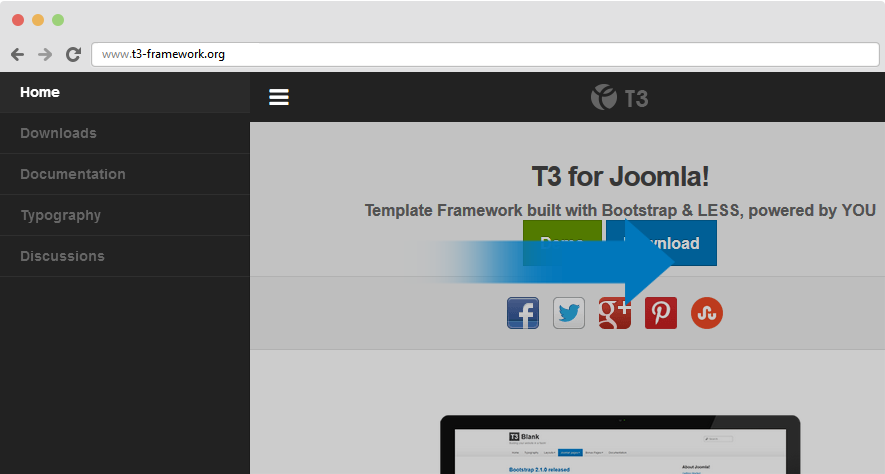
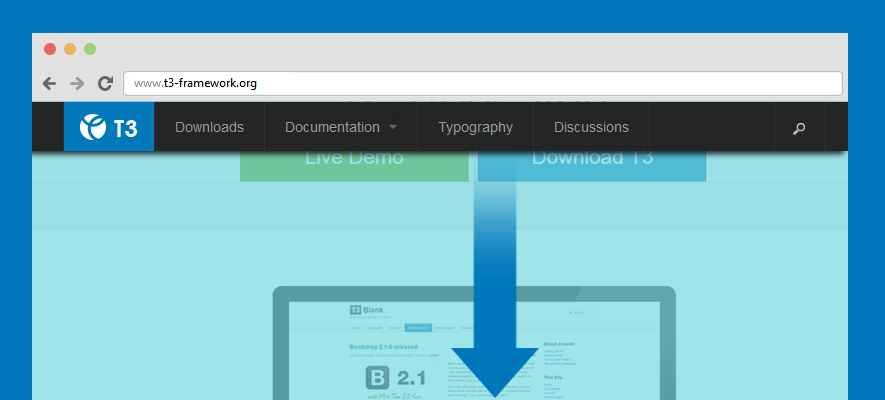
Front-end Appearance
Sticky Navigation
Sticky navigation, also known as fixed navigation is basically a website menu that is locked into place so that it does not disappear when the user scrolls down the page; in other words, it is accessible from anywhere on the website without having to scroll.
Add sticky navigation in templates developed with T3 Framework (JA Brisk, JA Mero)
Step 1: upgrade T3 Framework plugin to version: 1.2.1
Step 2: add class to sticky navbar in desktop and mobile layout
To sticky navbar, add class navbar-collapse-fixed-top (for collapse menu) and navbar-fixed-top (in desktop) to #ja-mainnav div (the file is in file: mainnav.php located in: templates\ja_mero\tpls\blocks). You may need update the margin-left & margin-right for the mainnav div
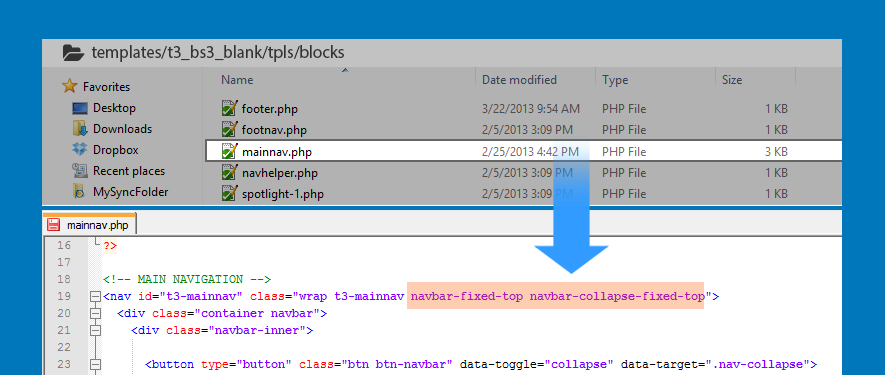
<nav id="ja-mainnav" class="wrap t3-mainnav navbar-fixed-top navbar-collapse-fixed-top">
Megamenu Configuration
T3 framework supports MegaMenu, a missing feature in Joomla. With Megamenu, you can have your site menu system displayed in flexible ways. With the new way of configuration, it's much more easy for you to configure mega menu.
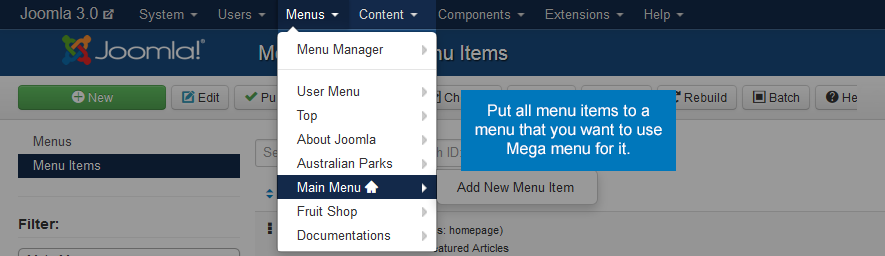
Please note that the megamenu setting is not global setting. If you use multiple styles, you need to enable and configure the megamenu option in the style you want to use the feature.
General Configuration
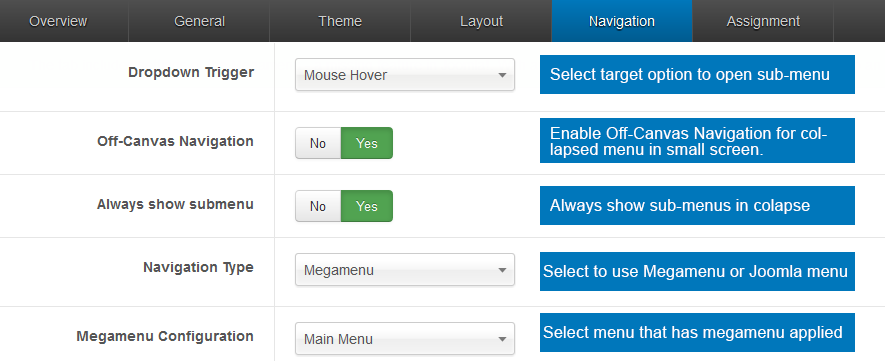
From setting panel of T3 blank template, select Navigation tab
- Dropdown Trigger: select target to open submenu (mouse hover or mouse click)
- Off-Canvas Navigation: this option is applied for collapse menu in small screen like ipad or mobile. This setting is shown in the above section (Off-Canvas Navigation)
- Always show submenu: for collapse menu in small screen, you can select to display all sub-menu or just main menu when you click on the Navigation button.
- Navigation Type: this option allows you to use megamenu or joomla menu system for current style.
- Megamenu Configuration: select menu that has megamenu enabled.
MegaMenu Configuration
There are 3 levels of configuration that you should know
- Sub-megamenu setting
- Column setting
- Menu item setting
1. Sub-megamenu setting
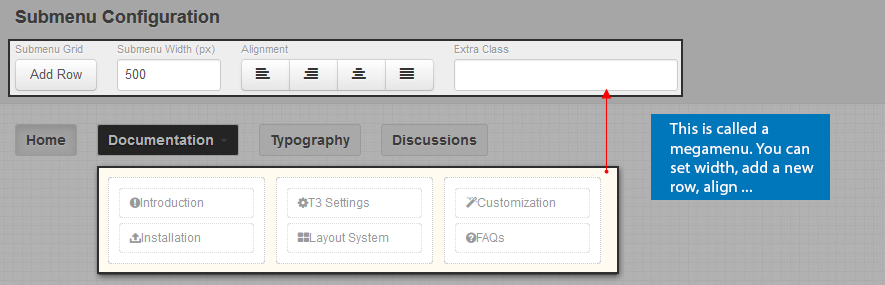
This setting allows you to configure the width of the sub-megamenu, add column, and add class that style for it.
2. Column Setting
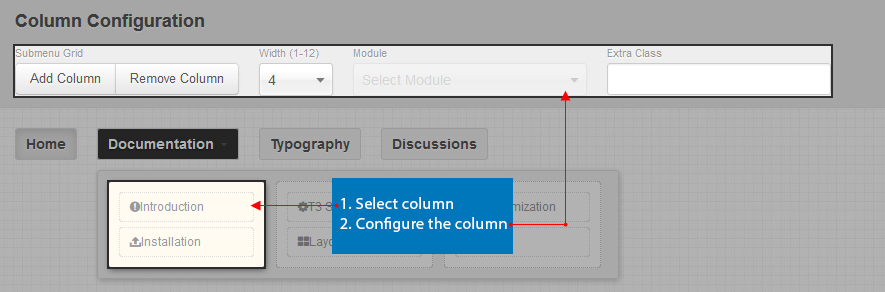
In this level of configuration, you can: Add column, remove column, set width of column, assign module to column.
3. Menu Item
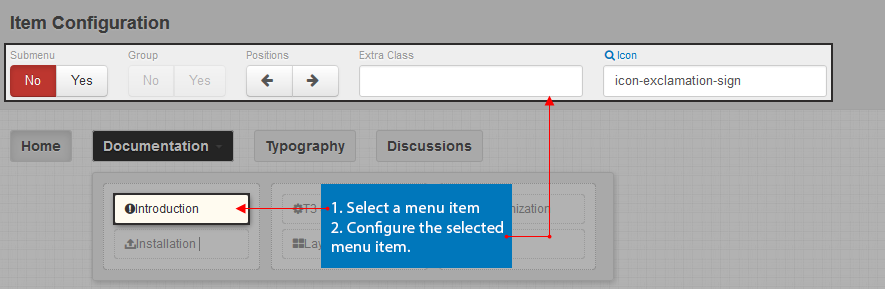
In this level of configuration, you can: enable or disable submenu if a menu item, display sub-menus in group or not, move menu item to right or left, assign a module to a module menu item, add icon for menu item.
How to use Megamenu Setting options
Add new column, row and assign module to the column, row.
Step 1: Click on a column then select to add column/row.
Step 2: In each column, add new columns.
Step 3: Now assign module to the column/row.
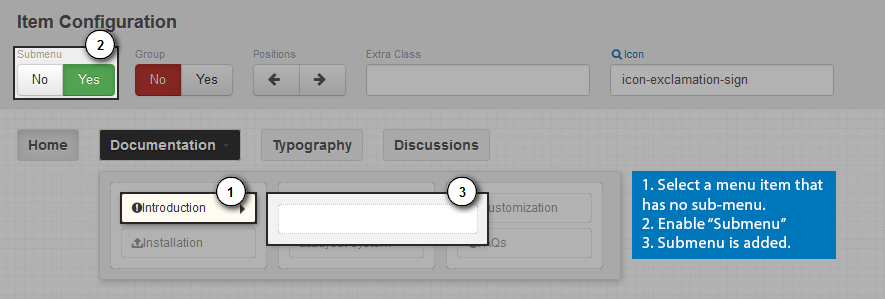
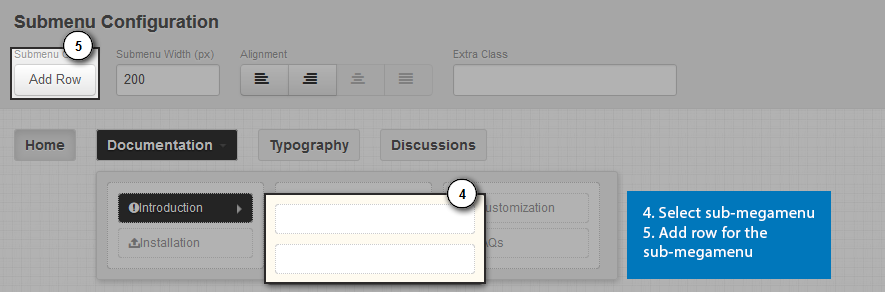
Adding a Submenu to a menu item
Click on the menu that you want to add submenu (you can only add submenu for a menu that has no submenu).

Add 2 modules in a column
Step 1: Select a menu that has no submenu then add submenu for the menu item
Step 2: Add row for the sub-megamenu
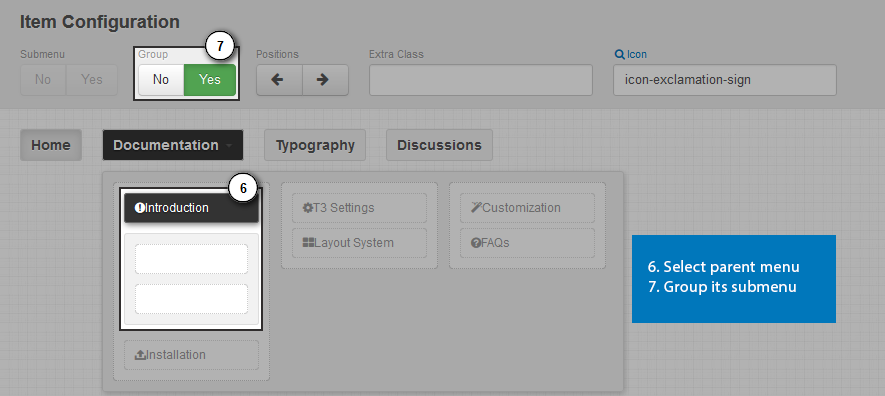
Step 3: Group the submenus
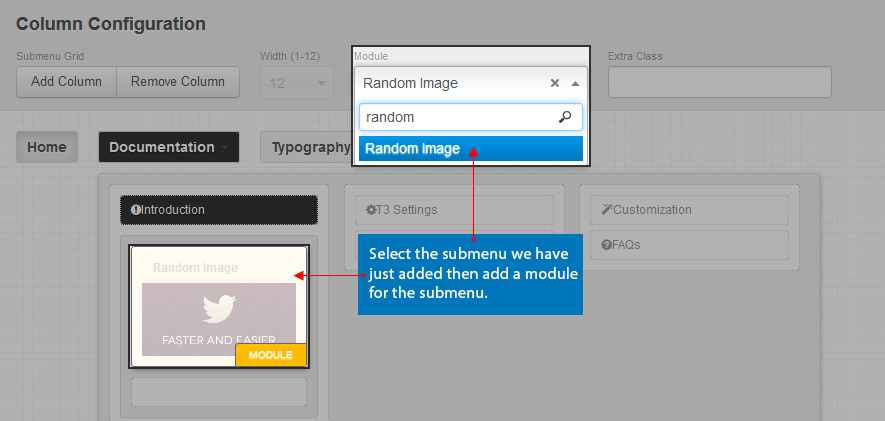
Step 4: Assign modules to the submenu
Style for MegaMenu
You can style for the MegaMenu item by adding class to the field: Class.

You can add class for a mega menu, for a column or for a menu item. So you should the priority oder. The priority order (Mega menu --> Column --> Menu Item) is from low to high.
There are 2 files that you can add style for MegaMenu.
megamenu.lessin:plugins/system/t3/base/lessmegamenu.lessin:templates/t3_blank/less
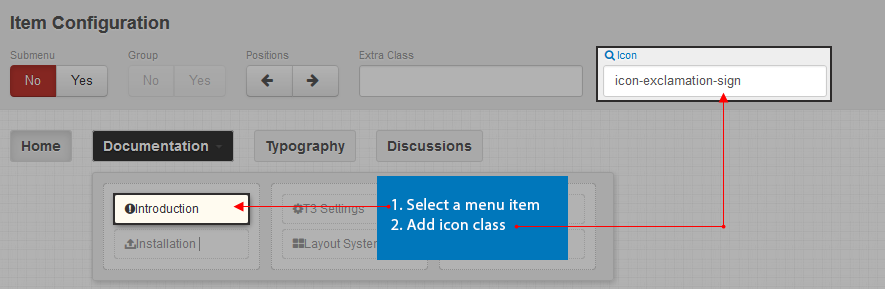
Add icon for menu item
You can add class to define icon that you want to add to menu item, or you can use classes of Bootstrap: http://twitter.github.com/bootstrap/base-css.html#icons
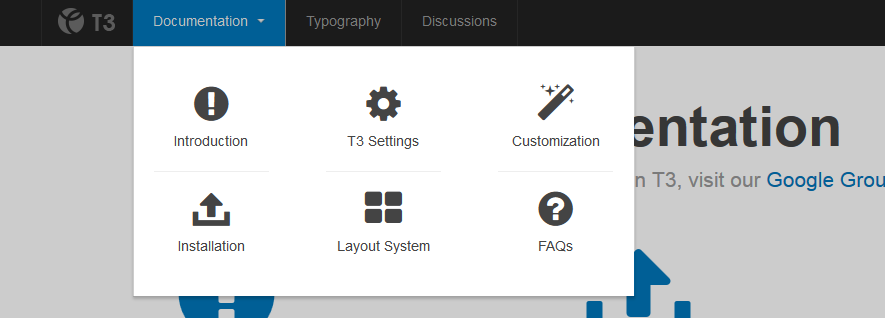
Let's check front-end
Animation Settings
T3 supports Megamenu with animation with one click. Please keep in mind that this feature is only available from version: 1.2.5
There are 2 fields for animation configuration: Animation type and Duration.

Currently, T3 supports 4 animation types: Fading, Slide, Elastic, and Zoom.

Adding Animation Effect for Megamenu
In this tutorial, you will learn how to add animation effect for Megamenu. There are 4 animation types, for each animation type selected, you can set the duration for that effect when you hovering or change menus.
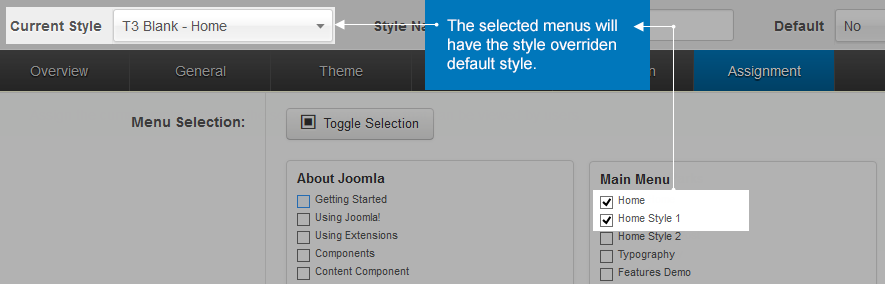
VI. Menu Assignment
In this section, assign the menus that will have the current style applied. Remember that the menus that are assigned will override the same menus in default style.